
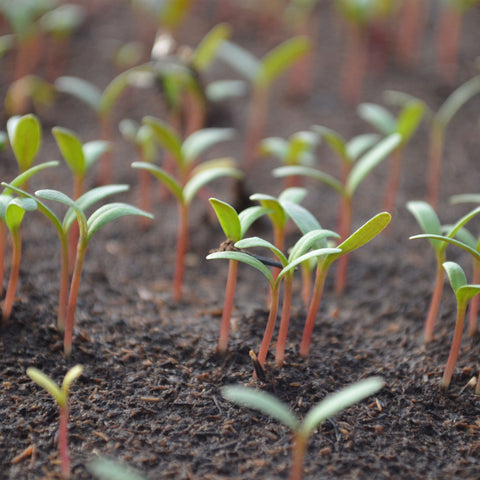
Watching seeds spring into life is a magical experience – but what do you do once your seedlings begin to outgrow the space available in their seed trays? When seedlings have developed two or more sets of true leaves, and are big enough to handle, they’ll need a helping hand to grow and develop.
The simple process of ‘pricking out’ involves carefully moving individual seedlings from their trays into pots or cells. This provides seedlings with plenty of room to develop into healthy young plants, with enough compost depth to form an extensive network of roots below the compost surface. Left in their original seed trays, seedlings will become overcrowded, competing for light, water and nutrients, which results in weak, spindly growth.
Densely packed seedlings are also prone to damping-off, a fungal disease that causes seedlings to rot and keel over. Pricking out seedlings while they’re young makes it easier to tease their roots from the compost. Left in-situ for too long, roots become intertwined, so it’s tricky then to separate each seedling and transplant it into a new pot.
Before you get started ...
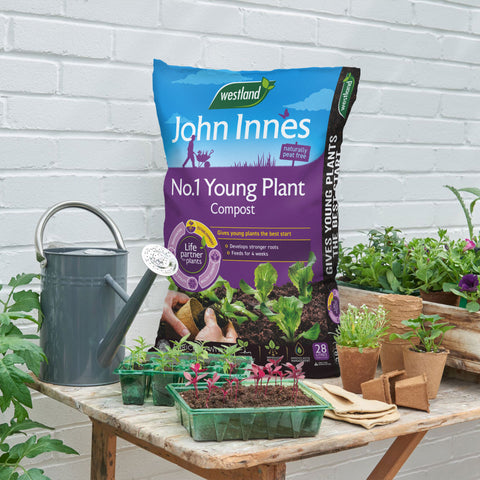
Before pricking out seedlings, make sure you have the right kit. The Gardman Planting & Labelling Set has everything you need to get started.
This includes a widger (a sort of miniature trowel to carefully ease delicate seedlings from their tray without causing any damage), a dibber (to quickly make planting holes in pots or cells filled with fresh compost), and labels and a marker pencil, which are essential so you don’t forget what you’ve planted. Once you have everything to hand, it’s time to get seedlings ready to move into their new homes. Around an hour before pricking out, water seedlings well, as it’ll make their roots easier to separate and ease out of the compost.
It's time to prick out
- Fill small pots (9cm pots are ideal for potting-up seedlings) or trays with Westland John Innes No.1 Young Plant Compost (peat-free).
- Use a dibber (a pencil will suffice if you don’t have a dibber) to make a hole in the compost for each seedling.
- Hold seedlings by a leaf and never by a fragile stem, which can easily be damaged. Use a widger to dig into the compost down to the roots working from the edge of the tray first, and gently lift upwards, so you feel the roots coming away from the compost.
- Using the widger, and still holding the seedling by a leaf, ease the seedling from the tray, using the widger to gently tease roots out with as much compost surrounding it as possible.
- Carefully lower the seedling into the hole created in the new pot or tray, so it sits at the same level as it did in its seedling tray. Firm the compost gently around the roots to ease it down.
And finally...
After pricking out, water seedlings using tap water (never use rainwater from water butts at this stage, as it can contain disease-causing pathogens). Use labels and a waterproof pen to mark-up your seedlings, then place in a light, frost-free place to grow on. Once seedlings have been pricked out and get growing, they will then in time need potting on.
Frequently Asked Questions
Can seedlings be planted deeper after pricking out? If they have become leggy (tall and spindly), certain seedlings such as tomatoes can be planted slightly deeper in their new pot – up to their first pair of leaves.
Why did seedlings die before I could prick them out? Damping-off, when seedlings are consumed by fuzzy white fungal growth and then collapse, is usually the cause. It’s most likely to strike when sowing seed indoors early in spring when temperatures are low. However, damping off can occur at any time, especially when seed is sown too thickly, air circulation is poor and humidity is high. There is no cure, so always sow seed thinly, take care not to overwater, use only tap water, and ventilate well to improve air flow.
Why have seedlings become leggy? A delay in pricking out can result in seedlings becoming overly tall and weak. Where seedlings become too crowded, they’ll reach upwards rapidly in search of better light levels. Pricking out on time will prevent seedlings from putting on an unwanted growth spurt.
Wouldn’t it be easier to hold a seedling by its stem when pricking out? Never handle a seedling by its stem! Stems are fragile and can easily be crushed or snapped. Always handle a seedling by a leaf when transplanting it into a new growing environment.
Why can’t I use rainwater on seedlings? Water collected in water butts is good for the garden but it can contain pathogens that are harmful to young seedlings. While rainwater is ideal for using on plants and shrubs in the garden, tap water is always recommended for watering seeds and seedlings, to reduce the chances of disease outbreaks.
What’s a ‘true leaf’? Gardening guides often instruct gardeners to prick out seedlings when ‘true leaves’ appear. True leaves are the second set of leaves after the initial seed leaves. They’re often stronger and easier to grip while pricking out, so you’re less likely to damage the seedling while moving it into a new pot or tray.
I have too many seedlings. Which should I choose to prick out? Choose the strongest, best-developed seedlings. Compost leftovers that are small, weak or struggling to grow.
How can I reduce the strain on my back during pricking out? Pricking out takes time and concentration, so create a comfortable working environment. Some gardeners prefer to sit and work at a table, while others opt to stand at a potting bench, so their back remains straight. If you have too many seedlings to prick out in one go, spread the job over a few days.
Back to Learn & Grow