
Sweet, juicy and bursting with flavour – it’s easy to see why tomatoes are the UK’s favourite home-grown crop. Tomatoes are among the easiest of edibles, rewarding gardeners with hundreds of fruits over a season. When you consider how expensive tomatoes are to buy at the shops these days, growing your own is a no-brainer. Plus you don’t even need a garden to grow mouth-watering tomatoes at home.
Plants will crop heavily in containers, while compact tomatoes are readily available that’ll thrive in window boxes and hanging baskets. For bumper crops, however, a veg plot or greenhouse is ideal. Tomatoes crop profusely in growing bags too (maximum of three plants per bag), so the options are endless.
Gardeners can choose between sweet, bite-size cherry tomatoes, traditional salad tomatoes, sweet plum tomatoes, giant beefsteaks or heritage and heirloom selections. Most fruits ripen to red, but some kinds yield orange or yellow fruits, so crops can appear as ornamental as they are edible. Before choosing, it’s important to cut through the tomato-growing jargon. Indeterminate tomatoes (also known as cordons) are tall types with a single stem that must be regularly tied in to a cane, while side shoots need to be pinched out to prevent plants from producing unwanted vegetation.
Determinate tomatoes (commonly known as bush types) are the ones to choose if you’re growing in hanging baskets or window boxes. Bush tomatoes don’t need to have side shoots pinched out, nor do they need a cane, so they’re incredibly easy to grow. Although tomatoes are available as young plants at garden centres in spring, the range on offer can be limited. Raising plants from seed opens up a world of choice, allowing gardeners to choose tomatoes that suit their taste buds and gardening style – and seed-raised tomatoes are much cheaper than buying ready-grown plants.
While old favourites such as ‘Moneymaker’ are reliable and prolific croppers, there’s plenty of other excellent performers to try. Have a go with the deliciously sweet and irresistible ‘Sweet Million’, a top-rated cherry type that can bear up to 50 fruits per truss! Tomato ‘Shirley’ F1 is another all-time greenhouse favourite that carries the Royal Horticultural Society’s Award of Garden Merit (AGM), the hallmark of great garden performance. And when it comes to size – and flavour – you won’t go wrong with ‘Marmande’, a brilliant beefsteak tomato that’s packed with rich, Mediterranean-style flavour.
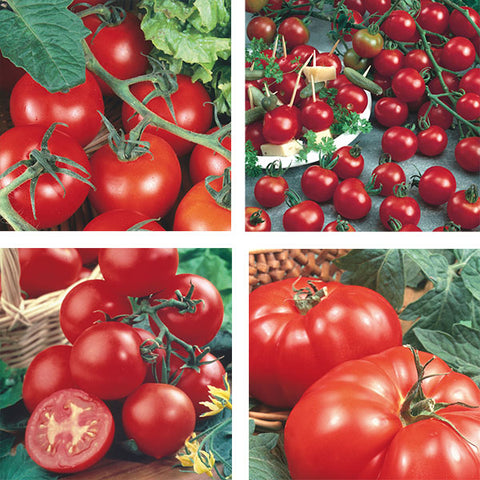
Clockwise from top-left: Moneymaker, Sweet Million, Shirley, Marmande
When to sow
Tomato seed should be nurtured into growth indoors in spring, but the exact timing depends on where the plants will be grown to maturity. If plants are destined to be grown in a greenhouse, sow seed from late February until March. For plants that will eventually crop outdoors, start seed under cover between late March and mid-April. Tomato seed needs warmth to germinate while seedlings won’t tolerate cold conditions, so seed should always be sown indoors or in a heated greenhouse.
How to sow
- Fill a small pot or seed tray with quality seed compost and moisten using a plant mister filled with tap water.
- Sow seeds thinly on the surface of the compost, then cover the seeds with a fine layer of compost or vermiculite.
- Place the pot or tray in a propagator, at a temperature of around 18-20C, with the propagator kept in a bright room but out of direct sunlight.
- Remember that sowing seed in succession (small amounts every couple of weeks, rather than sowing the whole packet in one go), will help spread harvests over a longer season and may avoid unmanageable gluts of fruit later in the season.
- Within a couple of weeks, seedlings will appear. Remove the propagator lid but keep the tray or pot in a bright position, otherwise plants can become leggy (tall and spindly).
- Keep the compost moist but take care not to over water, which can lead to damping off – a fungal disease that causes seedlings to rot and collapse. Damping off is most common when sowing early in the season, when light levels are low and temperatures are cooler.
Next steps
- After a few weeks, when plants have developed their first pair of true leaves (not their initial seedling leaves), it’s time to prick them out – the process of transplanting each seedling into its own individual pot.
- Fill small pots with peat-free multi-purpose compost and, using a dibber or pencil, make a hole in the compost in the centre of each pot.
- Holding each seedling by a leaf (and never by the stem which is easily crushed or snapped), use a dibber to gently prise the roots from the compost. The dibber can be used to support the weight of compost that’s attached to the roots.
- Carefully lower the seedling so its roots go down into the hole. Seedlings that have become leggy can be planted deeper than they were originally growing, up to the first pair of leaves. Firm seedlings into their new pots gently and irrigate with tap water.
- Keep young plants in a bright position where temperatures fall no lower than 16C. Plants sown early in the season are likely to need potting on into bigger pots during late spring. Plants grow rapidly, so a stick will be needed to support cordon types, and regular watering is a must.
- By late spring, tomato plants will be putting on considerable growth, but should remain indoors until risk of frost is over – that’s usually late May in the south or early June in cooler regions.
- Before planting out, ensure plants are fully hardened off – acclimatised to cooler, less humid outdoor conditions. Stand plants out on days when the weather is fair, before bringing them indoors again ahead of nightfall.
- When planting, a sunny spot is essential, as is quality compost or fertile, well drained moisture-retentive soil.
- Cordon tomatoes need support, and plants will need to be regularly tied in using string or garden twine.
- Regular watering is essential, as a host of tomato problems are associated with compost that has dried out.
- By mid-summer, trusses will appear, laden with yellow flowers. When the first truss has set (tiny matchstick fruits appear), it’s time to start liquid-feeding greenhouse tomatoes with a potassium-rich tomato fertiliser. Tomatoes growing outdoors should be fed once the second truss of fruit has set.
- Tomatoes in greenhouses will need protection from the heat of the midsummer sun. Apply greenhouse shading to glass to prevent leaf scorch, and ensure that greenhouse roof vents and doors remain open to boost ventilation.
Harvesting
Tomatoes crop well over a long season, with the first fruits often appearing in mid-summer and carrying on into early autumn. Bite-size cherry fruits, and tomatoes growing in the warmth of greenhouses, are fastest to ripen. Tomato plants are such heavy croppers that gardeners often harvest fruits several times a week by late summer. Wait until fruits are evenly coloured before harvesting. To pick, grip tomatoes individually and detach fruits from the truss, with their stalk still attached.
Flavour is richest when fruits are eaten after harvesting. They’ll keep in a fridge for a week or two, but flavour deteriorates over time when fruits are stored in cool conditions. Regular feeding holds the key to keeping plants cropping over a long season, so carry on applying liquid fertiliser, such as Big Tom, until mid-August to enjoy harvests into autumn.
Common problems, pests & diseases
Tomatoes can suffer from a few issues but the good news is that most are easily fixed. Follow our quick guide to tackling tomato troubles:
Leaf roll. Good news, it’s usually nothing to worry about! If foliage is healthy but leaves curl inwards, it’s usually just a reaction to fluctuating day and night temperatures.
Flowers dropping. It’s not uncommon for the little yellow flowers to drop from trusses. A dry atmosphere or lack of pollination is usually to blame. Mist flowers at the start of the day and dampen down greenhouse floors to raise humidity. Gently tap plants to help pollination, and leave roof vents open to encourage pollinating insects to visit.
Dark blotches at end of fruit. Known as blossom end rot, it’s a common problem that strikes when compost has been allowed to dry out. Prevent these leathery patches by watering regularly when fruit is swelling.
Cracked fruit. Tomatoes that split will still be edible. Fruits often split when heavy rain follows a dry spell, causing tomatoes to put on a growth spurt that tears the skin. Keeping soil or compost evenly moist is the best prevention.
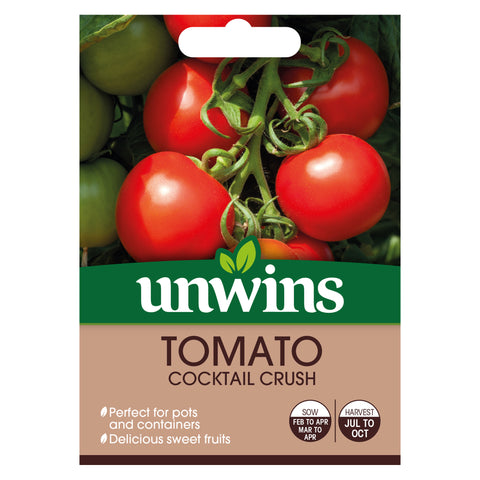
Tomato blight. This destructive disease is the bane of tomato growers’ lives. Commonly striking in warm, wet weather, blight causes leaves, stems and fruits to rapidly decay. There’s no cure, so affected plants must be binned or burnt (don’t compost the waste). Try growing a blight-resistant tomato next season, such as Unwins Tomato ‘Cocktail Crush’.
Frequently Asked Questions
How do I stop growing bags of tomatoes drying out so quickly? Buy the biggest, fattest growing bags that contain a deep fill of compost. Stand growing bags in deep plastic trays that can be filled with water and act as a reservoir on hot days. Try a Big Tom Peat-Free Grow Bag for bigger, tastier tomatoes!
Will tomato plants crop for more than one season? No. By the end of September plants will be exhausted, and even if they’re still growing, they’ll be struck down by the first frosts. Lift tired plants and compost them at the end of the season, as long as they haven’t been affected by blight.
It’s nearly the end of the season and fruits are still green. What should I do? Cut excess foliage from plants and remove shading from greenhouses to maximise light transmission. If plants are going over, unripe fruit can be left on a sunny greenhouse staging to ripen. Some gardeners use the technique of placing green fruit in a drawer with a banana, to encourage ripening.
Back to Learn & Grow